Spring 비동기 처리의 이해 3(Webflux with R2DBC, 게시판 만들기)
by Glenn
이전 포스트에서 Reactive Streams Interface를 이해하였습니다. (Reactive Streams Interface 구현해보기)
이제 Spring Webflux를 사용하여 프로그램 간단한 게시판을 만들어보겠습니다.
어플리케이션 구성
- Springboot starter webflux
- rxNetty, Reactor를 이용한 비동기 어플리케이션 지원
- R2DBC
- 기존 JDBC는 Blocking방식으로 동작하는 문제가 있어, Reactive Relational Database Connectivity (R2DBC) 이용해야 완전한 비동기 어플리케이션 개발이 가능
- H2 Database
- In-Memory DB로 동작하며, Local에서 개발 또는 테스트코드 수행시 사용되고, R2DBC를 지원
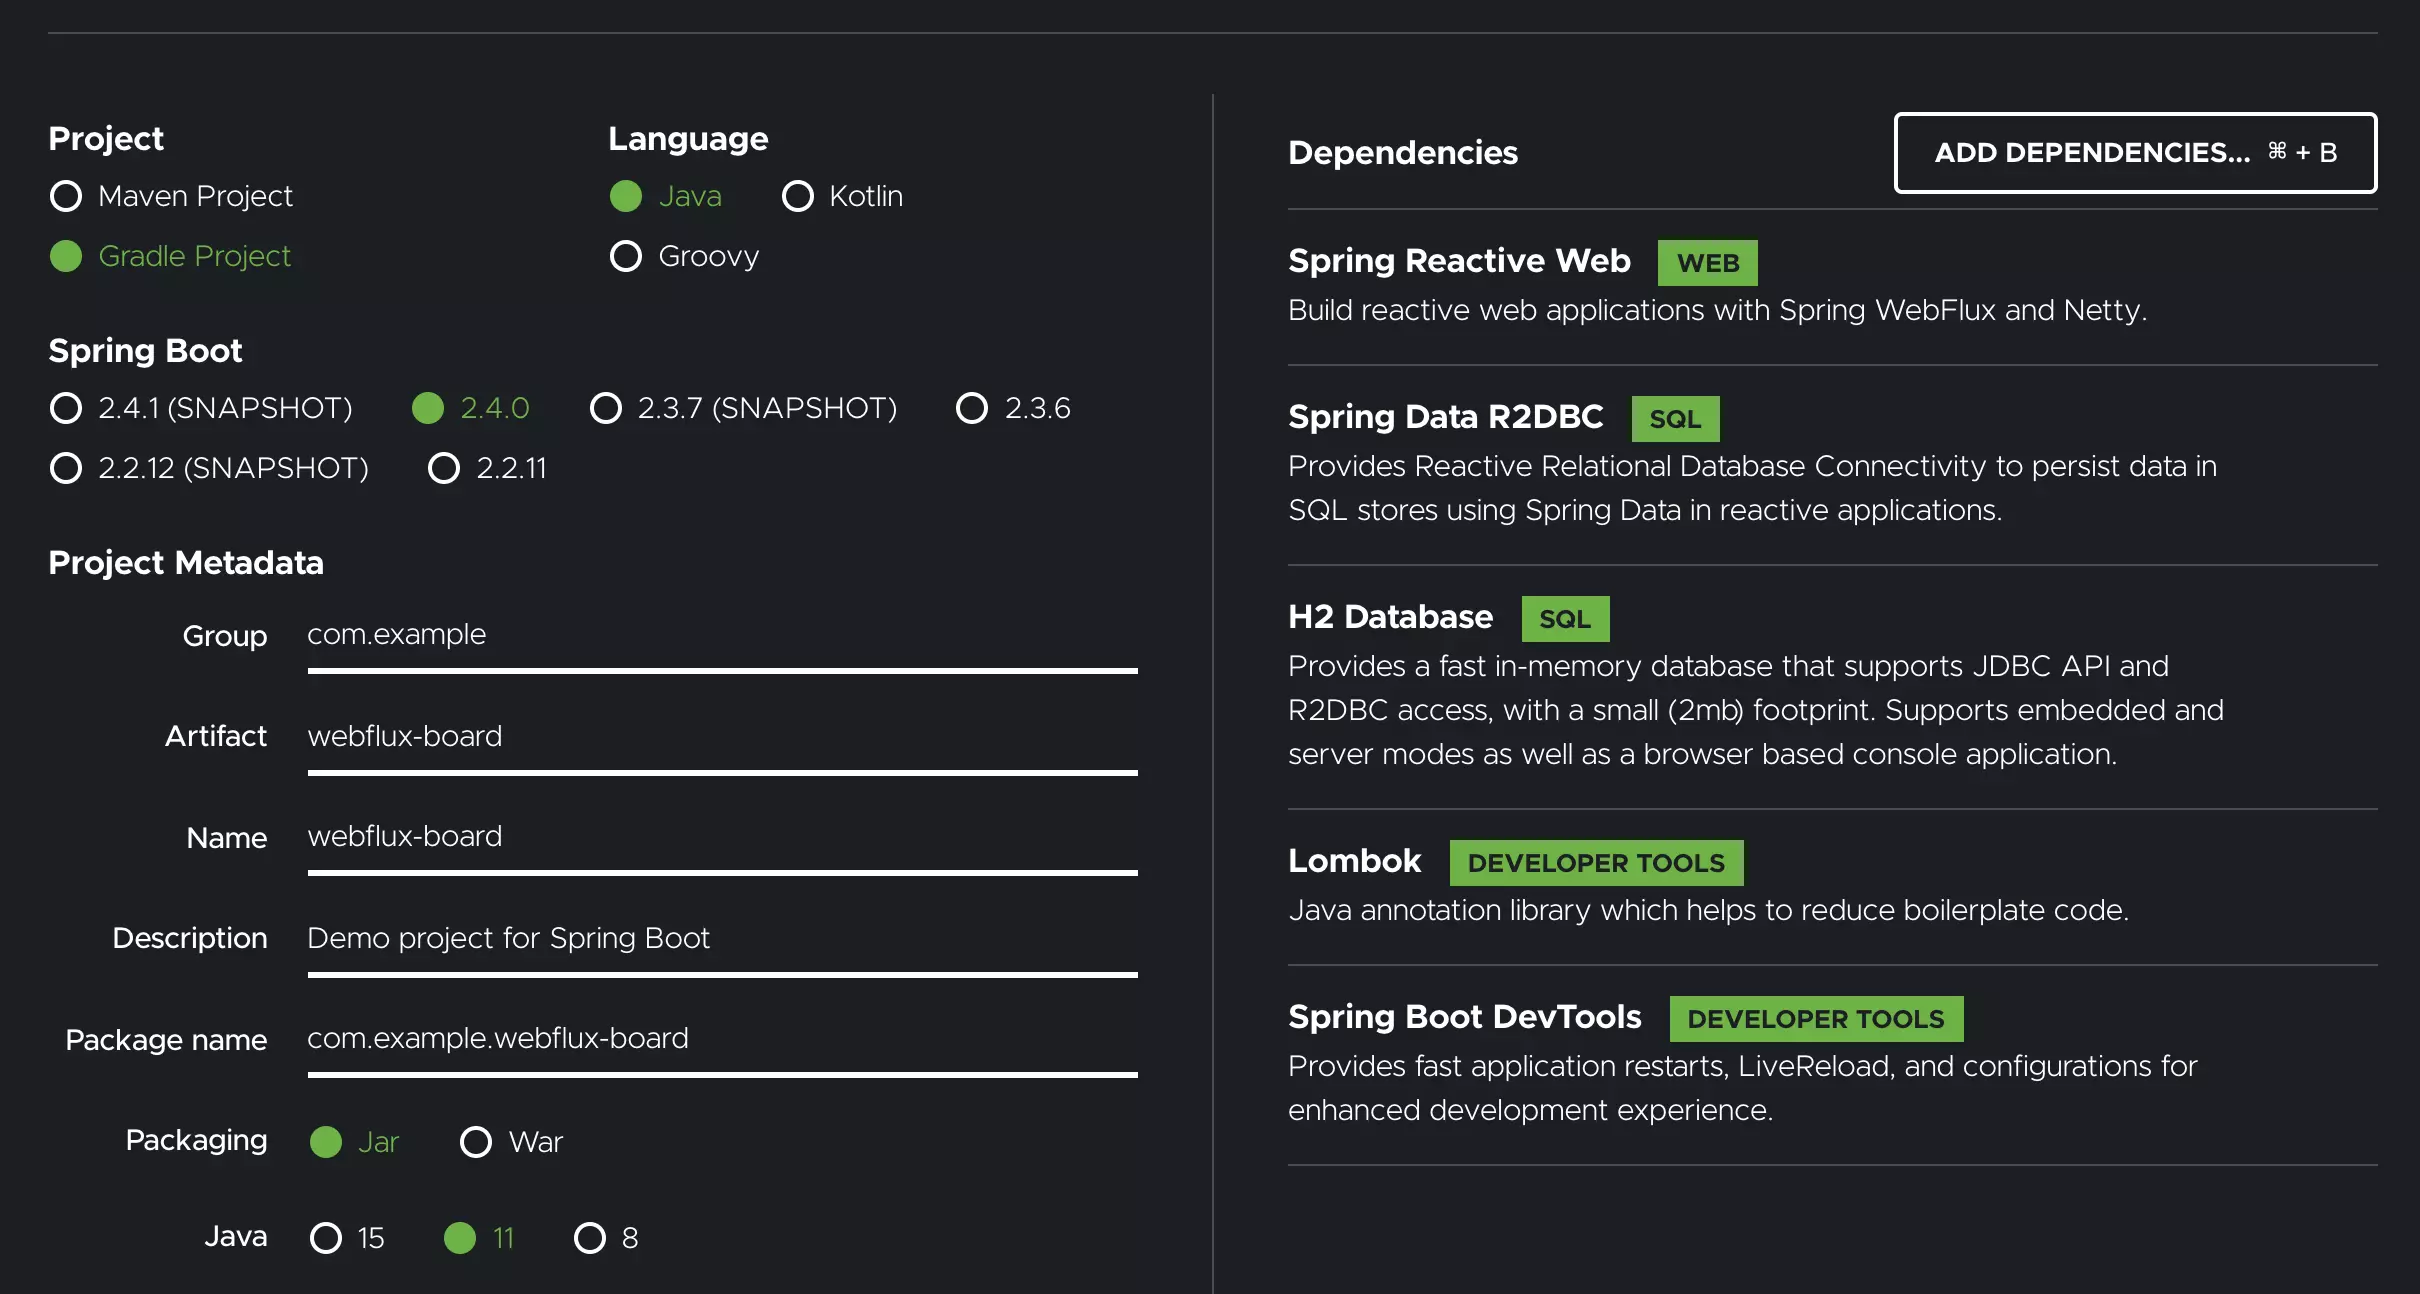
Spring initializr를 사용하여 프로젝트 구성
Spring initializr를 사용하여 다음과 같 스프링 프로젝트를 생성합니다.
H2 Console 실행
springboot-starter-web을 사용하면 h2-console 설정만으로 h2-console을 실행할수 있었지만,
springboot-starter-webflux에서는 별도로 띄워주는 코드를 작성해야합니다.
org.h2.tools.Server를 사용하여 h2-console을 실행하기위해, build.gradle의 해당부분을 수정합니다.
runtimeOnly 'com.h2database:h2' 삭제
runtimeOnly 'io.r2dbc:r2dbc-h2' -> implementation 'io.r2dbc:r2dbc-h2'
프로젝트 파일을열고 application.properties 파일을 application.yaml로 변경합니다.
그 다음, application.yaml에 h2 console port를 추가해줍니다.
webclient.h2-console-port: 8081
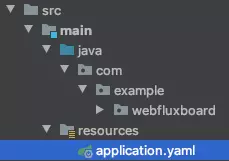
config 디렉토리를 만들고, H2ServerConfig, H2R2dbcConfig 2개의 class를 생성합니다.
H2ServerConfig
package com.example.r2dbc.config;

import org.h2.tools.Server;
import org.springframework.beans.factory.annotation.Value;
import org.springframework.context.annotation.Configuration;
import org.springframework.context.annotation.Profile;
import org.springframework.context.event.ContextClosedEvent;
import org.springframework.context.event.ContextRefreshedEvent;
import org.springframework.context.event.EventListener;

import java.sql.SQLException;

import lombok.extern.slf4j.Slf4j;

@Slf4j
@Profile("h2")
@Configuration
public class H2ServerConfig {
    private Server webServer;

    @Value("${webclient.h2-console-port}")
    Integer h2ConsolePort;

    // ApplicationContext : Bean 생성, Dependency Injection, ResourceLoader, ApplicationEventPublisher등 역할
    // ContextRefreshedEvent: ApplicationContext가 초기화 시에 발생하는 이벤트
    @EventListener(ContextRefreshedEvent.class)
    public void start() throws SQLException {
        log.info("starting h2 console at port {}", h2ConsolePort);
        this.webServer = Server.createWebServer("-webPort", h2ConsolePort.toString());
        this.webServer.start();
    }

    // ContextClosedEvent: ApplicationContext가 종료시에 발생하는 이벤트
    @EventListener(ContextClosedEvent.class)
    public void stop() {
        log.info("stopping h2 console at port {}", h2ConsolePort);
        this.webServer.stop();
    }
}
H2R2dbcConfig
package com.example.r2dbc.config;

import org.springframework.context.annotation.Bean;
import org.springframework.context.annotation.Configuration;
import org.springframework.context.annotation.Profile;
import org.springframework.core.io.ClassPathResource;
import org.springframework.data.r2dbc.config.AbstractR2dbcConfiguration;
import org.springframework.data.r2dbc.connectionfactory.init.ConnectionFactoryInitializer;
import org.springframework.data.r2dbc.connectionfactory.init.ResourceDatabasePopulator;
import org.springframework.data.r2dbc.repository.config.EnableR2dbcRepositories;

import io.r2dbc.h2.H2ConnectionConfiguration;
import io.r2dbc.h2.H2ConnectionFactory;
import io.r2dbc.h2.H2ConnectionOption;
import io.r2dbc.spi.ConnectionFactory;

@Profile("h2")
@EnableR2dbcRepositories
@Configuration
public class H2R2dbcConfig extends AbstractR2dbcConfiguration {

    @Override
    public ConnectionFactory connectionFactory() {
        return new H2ConnectionFactory(H2ConnectionConfiguration.builder()
                .inMemory("testdb") // 데이터베이스 이름
                .property(H2ConnectionOption.DB_CLOSE_DELAY, "-1") // DB연결이 닫혀도 유지되도록 설정
                .username("sa")
                .build());
    }

    @Bean
    public ConnectionFactoryInitializer h2DbInitializer() {
        ConnectionFactoryInitializer initializer = new ConnectionFactoryInitializer();
        ResourceDatabasePopulator resourceDatabasePopulator = new ResourceDatabasePopulator();
        resourceDatabasePopulator.addScript(new ClassPathResource("schema-users-h2.sql"));
        resourceDatabasePopulator.addScript(new ClassPathResource("schema-boards-h2.sql"));

        initializer.setConnectionFactory(connectionFactory());
        initializer.setDatabasePopulator(resourceDatabasePopulator);
        return initializer;
    }
}
그다음, resources 디렉토리 아래에 다음 sql파일을 추가합니다.
schema-boards-h2.sql
create table boards (
    id BIGINT AUTO_INCREMENT NOT NULL,
    title VARCHAR(500) NOT NULL,
    content VARCHAR(4000) NOT NULL,
    updated_at datetime NOT NULL,
    created_at datetime NOT NULL
);

insert into boards (title, content, updated_at, created_at) values ('Title 1', 'Content1', now(), now());
insert into boards (title, content, updated_at, created_at) values ('Title 2', 'Content2', now(), now());
insert into boards (title, content, updated_at, created_at) values ('Title 3', 'Content3', now(), now());
schema-users-h2.sql
create table users (
    id BIGINT AUTO_INCREMENT NOT NULL,
    name VARCHAR(50) NOT NULL,
    age INT NOT NULL,
    profile_picture_url VARCHAR(200) NULL,
    updated_at datetime NOT NULL,
    created_at datetime NOT NULL
);

insert into users (name, age, profile_picture_url, updated_at, created_at) values ('user1', 10, null, now(), now());
insert into users (name, age, profile_picture_url, updated_at, created_at) values ('user2', 20, null, now(), now());
insert into users (name, age, profile_picture_url, updated_at, created_at) values ('user3', 30, null, now(), now());
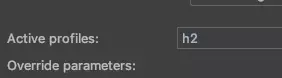
이제, 어플리케이션을 실행할텐데, 그전에 profiles를 h2로 설정해야합니다.
H2ServerConfig, H2R2dbcConfig에서 @Profile("h2")붙혀놓았는데요.
그이유는, profile에 따라서 DB를 선택하기 위함입니다.
우측 상단의 Run configuration에서 Active profiles를 h2로 설정
그후, 어플리케이션을 실행한후, http://localhost:8081으로 접속합니다.
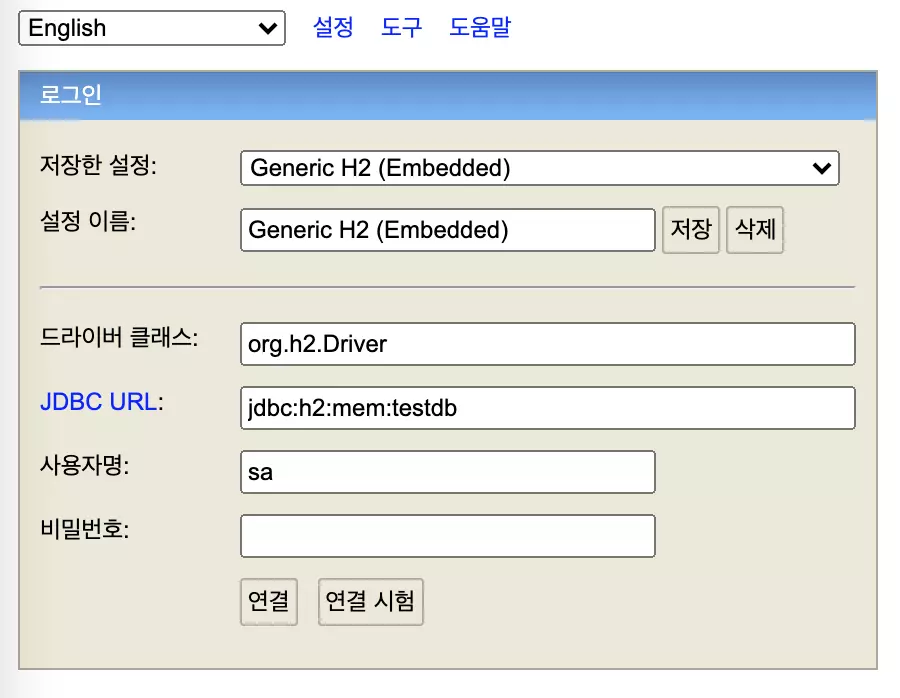
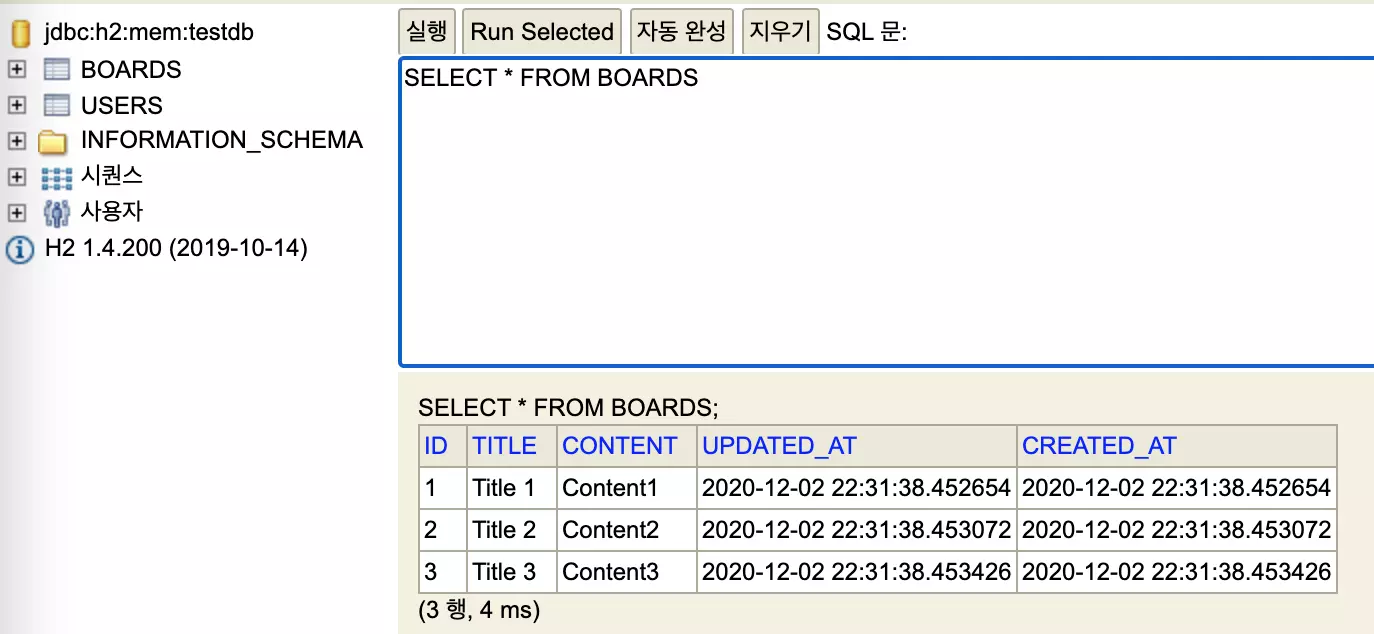
기본데이터가 생성된것을 확인할수있습니다.
이데이터는, H2 DB연결이 초기화될때, resources에 넣어두었던 sql이 실행된것입니다.
다음 포스트에선 해당 데이터를 조회하는 User API를 만들어보겠습니다.
Subscribe via RSS